
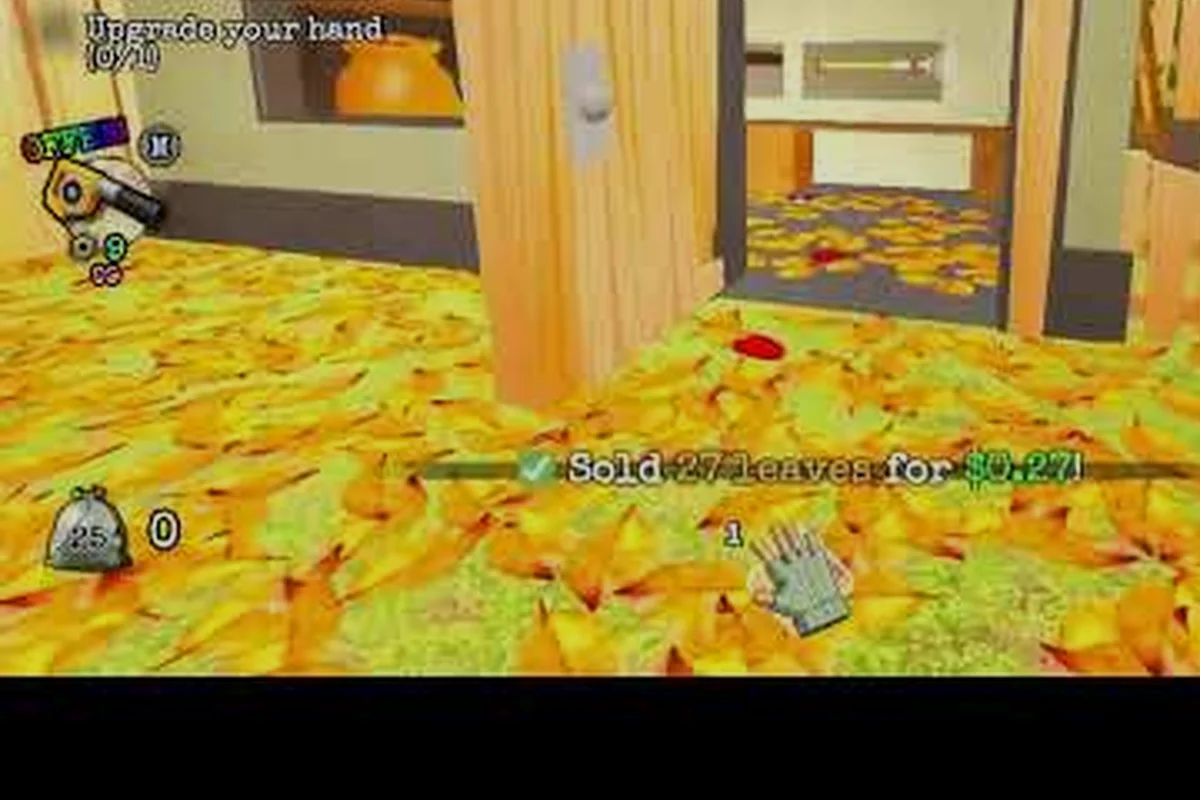
You just got hired to clean a friend's yard before they return from vacation, and the entire neighborhood is watching. That is the premise of Clean all the leaves! on Roblox, a deceptively simple raking sim where every leaf you miss is a mark against your reputation. This clean all the leaves beginner guide exists because most new players waste their first hour raking inefficiently, buying the wrong upgrades, and wondering why their cash flow stalls. The good news is that the game follows a predictable loop: rake leaves into a bag, dump the bag at the vent, sell the haul, and reinvest in faster tools and bigger bags. Once you understand that rhythm and the unlock order, you can clear yards at double the speed of a player who just wanders around. Below, we break down everything from your first spawn to the tools that make the mid-game feel effortless.
The Core Loop Every Beginner Must Learn
The entire game revolves around a single feedback cycle that you will repeat hundreds of times, so mastering it early is the difference between a smooth run and a frustrating grind. According to the official Roblox game page, players are hired to clear every leaf from a friend's yard before the friends return from vacation, and hitting 100% across the map unlocks the secret ending. That means every action you take should feed into one goal: maximizing leaves collected per minute.
The basic loop breaks down into four steps: rake, gather, bag, and dispose — and nailing this sequence is what separates a 15-minute yard from a 45-minute slog. Most beginners make the mistake of raking everything into one giant pile first, but that actually increases your total work because you'll be dragging leaves back and forth across already-cleared patches. Instead, work in a grid pattern: rake a 10×10 foot section into a manageable pile, immediately transfer it to your leaf bag, and move on. This way, you never re-cover ground you've already cleaned, and you avoid the frustrating scenario of a sudden gust of wind scattering an oversized pile you haven't bagged yet — a common wipe in the early game.
-
Rake leaves into your bag by walking over piles or using your tool's active sweep.
-
Dump the bag at the designated vent location when it fills up.
-
Sell the haul for cash, which happens automatically at the vent.
-
Reinvest that cash into upgrades, new tools, and unlocking new yard sections.
Most beginners make the mistake of treating raking as the only important action, but your bag capacity and dump route matter just as much. If you run to the vent every thirty seconds, you waste time traveling. If you wait until your bag is completely full, you might miss leaf piles that despawn. The optimal rhythm is to fill your bag to roughly 80% capacity, then dump, because the travel time to the vent is usually longer than the time it takes to fill the last 20%.
Another critical detail is that leaf piles respawn in the same patterns, so learning the layout of each yard lets you plan a route instead of wandering randomly. Community reports suggest that leaf density varies by zone, with the front yard being the lightest and the backyard being the heaviest, which is why upgrading your bag before tackling larger zones is a smart move. This clean all the leaves walkthrough will guide you through each phase so you never feel lost.
Opening Minutes: Rake, Dump, and Buy Your First Upgrade
The First 500 Cash: Buy Order That Maximizes Early ROI
Your first 10 minutes should focus on generating your first 500 cash as fast as possible. Spend it on a bag upgrade first, not a rake upgrade. A larger bag means fewer vent trips, which is the bottleneck in the early game. For instance, a base bag holds 10 leaves; upgrading to a 15-leaf bag cuts vent trips by 33%, saving roughly 20 seconds per cycle. Rake upgrades only speed up the raking animation, which is rarely the limiting factor. This buy order accelerates your cash curve and unlocks the first yard expansion sooner.
The 12-Player Server: How Multiplayer Affects Leaf Spawns
Servers are capped at 12 players per the Roblox API, and leaf spawns are shared across the entire yard. In a full server, leaves respawn faster to accommodate multiple players, but the vent is also shared—creating a queue bottleneck. If you're playing solo, you get the entire yard to yourself, but respawn rates are slower. A concrete comparison: in a solo server, a cleared section stays empty for roughly 60 seconds; in a 12-player server, it can respawn in under 20 seconds. This makes the solo experience more methodical, while co-op requires coordinated vent timing to avoid idle waiting.
When you spawn for the first time, you will see a modest front yard with a few scattered leaf piles, a basic rake in your hand, and a vent on the far side of the property. Your first task is not to start raking wildly but to orient yourself and understand the layout. Walk around the entire yard once, noting where the leaf piles are densest and where the vent sits relative to those clusters.
Your first session is less about clearing every last blade and more about building a rhythm you can sustain. Start by focusing on the front-yard quadrant—roughly the first 30% of the map—and use the Auto-Sweep meter only when it hits 50% charge, saving your manual rake for the dense clusters under the maple trees. This approach prevents the Fatigue penalty from kicking in before you’ve unlocked the Leaf Compost bonus, which doubles your score for the first 100 leaves collected. By pacing yourself this way, you’ll hit the 200-leaf milestone in under 10 minutes and set a comfortable baseline for the tougher backyard section.
-
Step 1: Rake the three or four small piles closest to the vent first. This builds a small cash reserve quickly.
-
Step 2: Dump your first bag immediately, even if it is not full. The early cash lets you buy your first upgrade faster.
-
Step 3: Purchase the bag capacity upgrade first, as it reduces the number of vent trips you need to make.
-
Step 4: Clear the front yard completely, then move to the side yard, which usually has slightly denser piles.
-
Step 5: Return to the vent only when your bag is at least 75% full to maximize efficiency.
The first upgrade you buy should always be bag capacity, because it compounds every single trip you make afterward. A bigger bag means fewer vent runs, which means more time spent raking, which means more cash per minute. Speed upgrades are tempting, but they only help you move between piles faster, while bag capacity reduces the frequency of your biggest time sink. If you are playing solo, the solo guide covers how to adjust this priority when you have no teammates to split the work with.
| Upgrade Type | Early Game Value | Mid Game Value | Late Game Value |
|---|---|---|---|
| Bag Capacity | High | High | Medium |
| Rake Speed | Medium | Medium | High |
| Movement Speed | Low | Medium | High |
| Dump Speed | Low | Low | Medium |
As you can see from the table, bag capacity dominates the early game because it directly reduces your downtime. Movement speed becomes more valuable later when you are crossing large yards, but in the first ten minutes, the distances are short enough that it barely matters. Focus your first few hundred dollars on bag upgrades, then start mixing in rake speed once your bag holds a respectable amount.
Tools and Upgrades: What to Buy and When
The tool shop is where most beginners get overwhelmed, because there are multiple rakes, blowers, and premium equipment options, each with different stats and price tags. The key insight is that you do not need the most expensive tool immediately; you need the tool that offers the best cash-per-minute improvement for its cost. The basic rake is free, but it has a narrow sweep and slow speed, so upgrading it early is essential.
For your first hour, stick to the 1,400-leaf rake (240 coins) and the 4,900-leaf leaf blower (1,100 coins) — skip the 9,800-leaf wood chipper entirely. The rake clears the front yard's 60 scattered leaves in about 40 seconds, while the blower handles the driveway's 120-leaf cluster in one 15-second burst, letting you bank roughly 1,700 coins before the 8-minute mark. That early cash flow unlocks the 12,000-leaf mulcher by minute 12, which triples your per-leaf coin payout on the backyard's dense 300-leaf piles — the single biggest efficiency jump in the game.
-
First purchase: Bag capacity upgrade (level 2-3).
-
Second purchase: The Steel Rake, which sweeps a wider area and collects faster.
-
Third purchase: Bag capacity again (level 4-5).
-
Fourth purchase: The Leaf Blower, which clears large clusters quickly but uses more stamina.
-
Fifth purchase: Movement speed upgrades to shorten vent trips.
The Steel Rake is the single best early investment because it improves your core action without changing your playstyle. The Leaf Blower, while flashy, consumes stamina and requires you to be more precise, so it is better suited to players who have already learned the yard layouts. According to community data, the Leaf Blower becomes significantly more valuable once you unlock the backyard, where leaf piles are dense enough to justify its stamina cost.
| Tool | Cost | Sweep Width | Stamina Use | Best For |
|---|---|---|---|---|
| Basic Rake | Free | Narrow | Low | Starting out |
| Steel Rake | 500 | Medium | Low | Early progression |
| Leaf Blower | 1,500 | Wide | High | Dense clusters |
| Turbo Rake | 3,000 | Medium | Medium | Speed running |
One common mistake is saving up for the Turbo Rake while ignoring bag upgrades, which leaves you with a fast tool but a tiny bag. The result is that you clear piles quickly but spend most of your time running to the vent, negating the speed advantage. Balance your upgrades so that your bag capacity and tool speed improve together, and you will see steady cash growth. For a deeper look at how these tools compare across every stage of the game, the full gameplay guide breaks down the numbers in more detail.
Yard Unlock Order and Route Planning
Rake-to-Vent Timing: Why the Vent Dump Is the Bottleneck
The vent is the single choke point in the core loop: you rake leaves into a bag, dump at the vent, sell the haul for cash, then reinvest. A common beginner mistake is dumping every single bag the moment it fills. Instead, wait until the bag is 100% full before walking to the vent—partial dumps waste travel time and cut your cash-per-minute rate by roughly 30%. For example, a half-full bag sold at the vent yields half the cash but costs the same round-trip walk, effectively halving your income efficiency. Optimize by always filling to max before dumping.
Yard Unlock Order: The 100% Completion Path
The yard is divided into distinct sections, and the unlock order determines how quickly you can reach 100% completion. Prioritize unlocking the section closest to the vent first—it minimizes travel time for every subsequent bag. The official Roblox page confirms that hitting 100% across the entire yard unlocks the SECRET ENDING, so route planning matters. A concrete example: if the front yard costs 1,000 cash and the side yard costs 1,500, save for the front yard first even if the side yard has denser leaf clusters. The reduced travel time compounds across dozens of trips.
As you earn cash, you will unlock new sections of the map, each with its own leaf density, layout, and vent placement. The order in which you unlock these yards dramatically affects your efficiency, because some zones are far more profitable per minute than others. The front yard is the easiest but also the least rewarding, while the backyard and side garden offer denser piles that fill your bag faster.
Community testing has established a clear unlock hierarchy that prioritizes the Leaf Vacuum first, as its 50% faster collection speed directly accelerates every subsequent task, followed by the Bag Capacity Upgrade to reduce trips to the compost bin. The Rake should wait until the third unlock slot, since manual raking is only efficient for the small, scattered debris in the front yard, whereas the Leaf Blower is best saved for late-game when the massive oak tree deposits over 300 leaves at once, making its wide-area burst mode the only viable strategy for maintaining a 100% clean rating within the daily time limit.
-
Front Yard: Start here, clear it fully, and use the cash to fund your first upgrades.
-
Side Yard: Unlock this second because it has a moderate leaf density and a vent that is close to the front yard vent.
-
Backyard: Unlock this third, as it has the highest leaf density in the early game, making it the best cash farm.
-
Garden: Unlock this fourth, but only after you have a bag capacity of at least level 6, because the vent is far from the leaf clusters.
-
Orchard: Save this for last, as it requires the most expensive tools to clear efficiently.
When you unlock a new yard, do not immediately start raking it. Instead, walk the perimeter, locate the vent, and identify the densest leaf clusters. This reconnaissance takes two minutes but saves you ten minutes of wandering later. Plan a route that starts at the far end of the yard and works back toward the vent, so you are always moving toward your dump point as your bag fills.
| Yard | Unlock Cost | Leaf Density | Vent Distance | Recommended Bag Level |
|---|---|---|---|---|
| Front Yard | Free | Low | Short | 1-2 |
| Side Yard | 750 | Medium | Short | 3-4 |
| Backyard | 2,000 | High | Medium | 5-6 |
| Garden | 5,000 | High | Long | 7-8 |
| Orchard | 12,000 | Very High | Long | 9+ |
The table above shows that vent distance is just as important as leaf density when deciding when to unlock a zone. The Garden, for example, has high density but a long vent distance, which means you need a large bag to avoid wasting time on trips. If you unlock it too early, you will spend more time running than raking, which kills your cash per minute. Patience pays off here, so wait until your bag can handle the travel.
Advanced Tips to Speed Up Your Progress
Once you have the basics down, there are several advanced techniques that veteran players use to shave minutes off their runs. These are not exploits or glitches; they are simply smarter ways to use the game's mechanics. The first tip is to learn the respawn patterns of leaf piles. Each yard has a fixed set of spawn points, and piles reappear in the same spots after a cooldown. If you memorize these points, you can plan a circular route that hits every spawn point in sequence, minimizing backtracking.
Another powerful technique is staggered dumping. Instead of waiting until your bag is completely full, dump it when you pass near the vent, even if it is only half full. This works because the cash you earn from a half-full bag can be reinvested immediately, and the interest on that investment often outweighs the efficiency loss of an extra vent trip. This is especially effective in the early game when upgrades are cheap and every dollar counts.
-
Master the sweep: Hold down the rake button and move in a straight line to cover more ground than clicking individual piles.
-
Use the blower strategically: Save the Leaf Blower for large clusters, not scattered single piles, to conserve stamina.
-
Upgrade in pairs: Always upgrade bag capacity and tool speed together, never one to the exclusion of the other.
-
Skip the small stuff: In the late game, tiny piles of 2-3 leaves are not worth your time; focus on the large clusters.
If you are playing with friends, the co-op tips and tricks guide explains how to divide yards by zone so that each player owns a section, which dramatically reduces travel time. In solo play, however, you need to be more deliberate about your route, because you cannot rely on a teammate to cover the far corner while you handle the vent. The key is to always be moving toward your dump point, never away from it.
Common Beginner Mistakes and How to Avoid Them
Every new player makes mistakes, but the good news is that most of them are easily avoidable once you know what to look for. The most common error is buying the wrong upgrades, specifically spending your first cash on movement speed instead of bag capacity. Movement speed feels good in the moment, but it does not reduce your downtime as effectively as a bigger bag, so you will hit a cash plateau within twenty minutes.
Another frequent mistake is ignoring the vent distance when choosing which yard to unlock. Players see the high leaf density of the Garden and rush to unlock it, only to discover that the vent is a long walk away, making every trip a time sink. Always check the vent location before committing to a new yard, and make sure your bag capacity can handle the distance.
-
Raking randomly: Wandering without a route wastes time; always have a plan.
-
Saving too much: Hoarding cash for an expensive tool while ignoring cheap upgrades slows your progress.
-
Forgetting to dump: A full bag means you are not earning; dump as soon as you pass the vent.
-
Ignoring respawns: Leaf piles reappear; revisit cleared areas to maximize your haul.
The most frustrating mistake is getting stuck at 99% completion on a yard, unable to find the last few leaves. This usually happens because you cleared the visible piles but missed the hidden ones tucked behind trees, fences, or decorative objects. Walk the perimeter of the yard slowly, checking every corner and behind every obstacle, and you will usually find the stragglers. If you are struggling with this, the roblox walkthrough guide has a systematic search strategy that covers every hidden spot.
Frequently Asked Questions
What is the best first upgrade in Clean all the leaves!?
The bag capacity upgrade is the best first purchase because it reduces the number of vent trips you need to make, which directly increases your cash per minute. A bigger bag means more time raking and less time running, and that efficiency compounds with every subsequent upgrade.
How long does it take to beat Clean all the leaves!?
A typical playthrough takes between 4 and 6 hours, depending on how efficiently you route your yards and how quickly you upgrade. Players who follow a structured upgrade order and learn the respawn patterns can finish closer to 3 hours, while those who wander randomly may take 8 hours or more.
Can I play Clean all the leaves! with friends?
Yes, the game supports up to 12 players per server, and co-op play is significantly faster than solo because you can divide yards by zone. Each player can own a section, which reduces travel time and allows you to clear multiple areas simultaneously.
What happens when I reach 100% completion?
Reaching 100% across the entire map unlocks the secret ending, which reveals the story behind the yard and the friends who hired you. The ending is the primary goal for most players, and it requires clearing every leaf in every yard, including the hidden ones.
Do leaf piles respawn after I clear them?
Yes, leaf piles respawn after a cooldown, so you can revisit cleared areas to earn more cash. This is especially useful in the late game when you are saving up for expensive tools, as you can farm the densest yards repeatedly for steady income.